HEEL LOCK
Heel-Lock Lacing: How the Runner's Loop Stops Heel Slip, Blisters and Achilles Rub
The two-loop lacing trick most runners never learn cinches the top of the shoe around the ankle, holds the heel deep in the counter, and eliminates the friction that causes most running blisters — no new gear required.
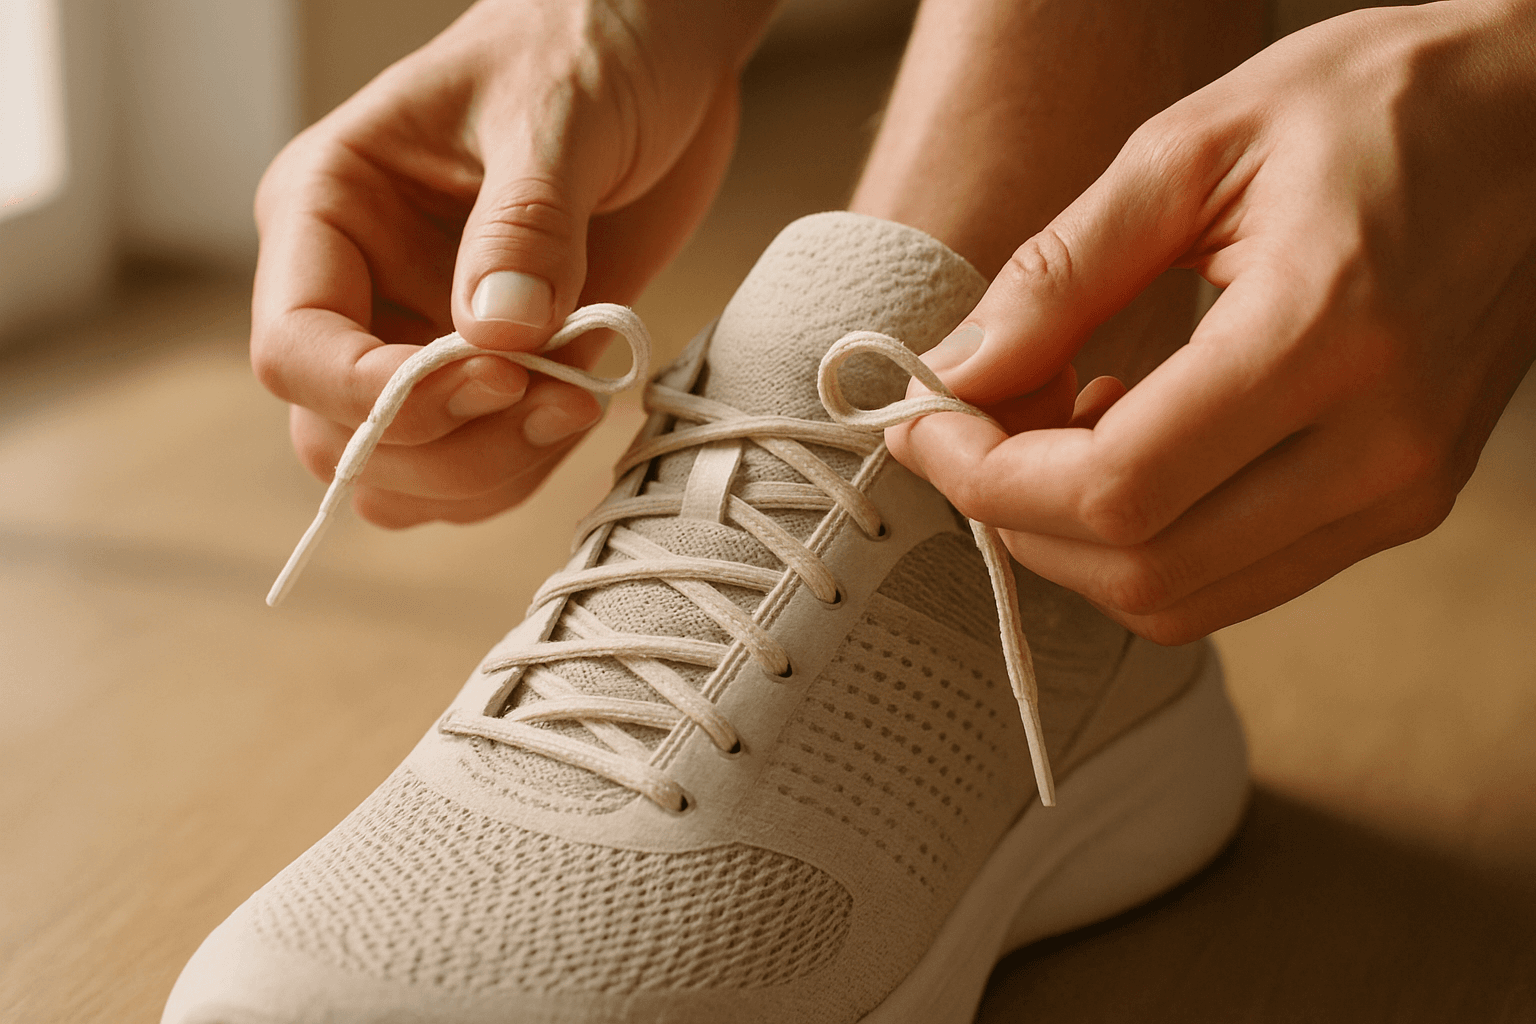
Heel-lock lacing — also called the runner's loop, the runner's knot, or the surgeon's lace — is a five-second addition to how you tie your shoes that solves an outsized share of heel and Achilles complaints in walkers and runners. Instead of running the laces straight through the top eyelets and tying them off at the top of the shoe, you use the second-from-top eyelets to feed the laces up through the top eyelet from the same side, forming two small loops at the very top of the shoe. Cross-lace the free ends through those loops, cinch, and tie as usual. The two loops act like a small vice at the top of the shoe, snugging the collar around the ankle and locking the heel into the counter below.
The reason it matters is friction. Most running blisters, most heel-slip complaints, and a good share of Achilles irritation come from the heel moving inside the shoe on every step — even a millimeter of slip, repeated ten thousand times over a long run, is enough to rub raw skin at the back of the heel or drag the counter across a tender Achilles insertion. Physio and podiatry clinics reach for heel-lock lacing before they reach for any new shoe or insole because it is the cheapest and fastest tool in the drawer. It is also one of the least-known: most runners have never been shown how, and shoe stores rarely demonstrate it unprompted.
This page walks through what heel-lock lacing is, when to use it, how to do it right, and the mistakes that turn a good technique into a foot-numbing tourniquet. Nothing here is medical advice. Persistent heel or Achilles pain that has not eased after four to six weeks of honest home care deserves an in-person exam by a doctor or podiatrist. Every recommendation on this hub is written for comfort, support and relief. If the top of your foot is sore from tight laces, try the pain on top of the foot page for window lacing. The same loop is one of the best blister prevention steps for the back of the heel.
What heel-lock lacing actually is
Almost every closed-toe athletic shoe has an extra eyelet just above the top set of holes you normally lace through. On most running shoes it is the seventh or eighth eyelet on each side, sitting slightly farther back toward the ankle than the row below. On some brands it is the same distance apart, on others it is set closer to the collar; either way it is there for a reason. The reason is heel-lock lacing.
The setup is simple. Lace the shoe as you normally do up to the second-from-top eyelet on each side. From the second-from-top eyelet, feed each lace up through the top eyelet on the same side (rather than crossing over to the other side as usual) and pull it snug so a small loop of lace hangs between the two eyelets. Do this on both sides so there is a loop on the left side of the shoe and a matching loop on the right. Then take the free end of the left lace and thread it through the right-side loop; take the free end of the right lace and thread it through the left-side loop. Pull both free ends firmly downward, then tie your bow as usual. The two loops cinch closed, the collar of the shoe pulls tight around your ankle, and your heel sits locked in the counter.
That is the whole technique. It takes about five seconds once you have done it a few times, and it works with any shoe that has the extra eyelet — running shoes, walking shoes, hiking boots, tennis shoes, work boots. Cross-training shoes without a proper heel-lock eyelet can be laced similarly by looping through the top eyelet, though the effect is slightly weaker.
Why the loops actually hold the heel down
The reason the loops matter, mechanically, is that they change the direction of the pull on the top of the shoe. In a standard cross-lace pattern, the laces run diagonally across the top of the foot and pull the two sides of the shoe together from the front and back at once — a broadly even squeeze across the instep. In a heel-lock pattern, the loops at the top eyelets pull each side of the shoe collar down and back toward the heel, so the collar of the shoe tips backward slightly and hugs the front of the ankle. That backward tip is what pushes the heel deeper into the counter and holds it there.
The consequence for the heel is significant. A heel that is held snugly in the counter does not slip up and down as the foot flexes at push-off, and it does not slide side to side on uneven ground. Podiatric and physio sources are consistent on this: a heel-lock is the standard first move for a shoe that fits well in the forefoot but has a slightly-too-loose heel, and it is the standard rehab move for anyone whose heel or Achilles pain traces to shoe friction. It is not a shoe-fit substitute for a shoe that is genuinely the wrong size — a much-too-loose shoe will still slip through a heel-lock — but it converts a slightly-loose fit into a snug one without changing the shoe.
The other quiet effect is on the instep. Because the heel-lock loops localize the tightening at the top of the shoe, you can loosen the middle and lower cross-lacing slightly to relieve pressure on the top of the foot without giving up heel security. Runners with a high instep or a wide forefoot who have had to over-tighten the whole shoe to keep the heel down often find they can lace the whole shoe more comfortably once the heel-lock is doing the work at the top.
When heel-lock lacing is the right first move
Heel slip on downhills. This is the flagship use case. Anyone who has run downhill in a shoe whose heel lifts off the counter with every step has felt the slip that ends in a blister at the back of the heel and, sometimes, a bruised toenail from the foot sliding forward into the toebox. Heel-lock lacing solves this cleanly: the heel stays in the counter, the toenail stays away from the toebox, and the run finishes without the blister that would otherwise be inevitable. Trail runners, downhill hikers and anyone doing steep descents should heel-lock by default.
Blisters at the back of the heel. Blisters right at the top of the heel bone, or the back-of-heel skin, are almost always a friction problem, and the friction is almost always a slipping heel. Heel-lock lacing eliminates the slip and eliminates the blister. Runners who blister at the back of the heel in a specific pair of shoes should try a heel-lock before assuming the shoes are wrong; the fix is often just the lacing.
Achilles irritation from a shoe collar. Some running shoes and many hiking boots have a collar that is stiffer or taller than the runner is used to, and the collar can rub the Achilles insertion at the back of the heel with each step. Heel-lock lacing pulls the top of the collar snug against the front of the ankle, which paradoxically reduces the friction at the back of the collar — the collar is now moving with the leg rather than against it. Milder Achilles irritation from shoe rub often settles with a lacing change alone.
A slightly-loose fit in a shoe you otherwise love. Every runner has been there — a shoe that fits perfectly through the forefoot and midfoot but is a hair loose in the heel. A heel-lock converts that shoe into a comfortable everyday pair without changing the shoe size or the model.
Common mistakes and how to fix them
Pulling too tight. The most common mistake with a new heel-lock is pulling the free ends way too hard when tightening the bow, which cinches the top of the shoe like a tourniquet against the front of the ankle. That numbs the foot within a mile and drives new pain rather than fixing the old one. The right feel is snug — tighter than a normal lace-up, but not painful, and not enough to pinch the front of the ankle. Loosen the middle laces slightly if the whole shoe feels too tight after adding the heel-lock.
Skipping the second loop. Some tutorials online show a single-loop variant that only uses one top eyelet on one side. That is not a heel-lock; it is a half-lock, and it does most of its work only on one side of the ankle. Use both top eyelets, feed both loops, and cross the free ends through the opposite loops. The symmetry is what makes the collar tip evenly backward.
Using it in the wrong shoe. Heel-lock lacing needs a proper heel counter to work — the stiff cup at the back of the shoe that holds the heel in place. A shoe with a soft, floppy heel counter (some minimalist runners, some slippers, many casual shoes) does not hold the heel even under a heel-lock, and the technique gives less benefit. If your shoe has a floppy heel counter, the shoe is the wrong tool, not the lacing.
Assuming it fixes a wrong-size shoe. A heel-lock converts a slightly-loose heel into a snug one. It does not save a shoe that is a full size too big or that has the wrong shape for your foot. If your heel slips out entirely on a lift test in the store, the shoe is the wrong size, and no amount of clever lacing will hold it.
Layering heel-lock lacing with other heel-pain tools
Heel-lock lacing pairs naturally with the therapeutic tools covered elsewhere on this hub. A supportive insole with a firm medial arch and a deep heel cup — the Akusoli insoles we would install first — sits inside the shoe and cradles the heel from below; the heel-lock holds the heel down into that cradle from above. The two work in the same direction. Anyone reading this hub for run-related heel pain gets more mileage out of both together than from either alone.
For readers with a specific complaint at the back of the heel — Achilles insertional pain, retrocalcaneal bursitis, a Haglund's bump — heel-lock lacing has a specific role in reducing the collar-on-Achilles friction that flares those patterns. It is not a treatment for the underlying tissue, but it removes one of the daily aggravators. Our pain in the back of the heel walk-through covers the rest of the plan.
For readers whose heel pain shows up in walking or running (as opposed to a specific injury), heel-lock lacing is one of the cheap wins on a longer list. Our walking or running page covers the full sequence, and heel-lock lacing is the first line item — a five-second change with no cost that removes one of the most common triggers of run-related blisters and heel-slip complaints.
The insole we would install alongside a heel-lock
Heel-lock lacing holds the heel down from above; a supportive insole with a firm medial arch and a deep heel cup cradles it from below. The two tools work together, and together they solve most run-related heel pain.
The insole we would install alongside a heel-lock →Frequently asked questions
What is heel-lock lacing?
It is a lacing technique that uses the top two eyelets on each side of an athletic shoe to form two small loops, then cross-laces the free ends through the opposite loops before tying the bow. The loops cinch the collar of the shoe snugly around the ankle and lock the heel down into the counter. Also called the runner's loop, the runner's knot, or the surgeon's lace, it is the standard first move in a physio or podiatry clinic for heel slip, back-of-heel blisters, and shoe-collar rub on the Achilles.
Does heel-lock lacing hurt or numb my foot?
Only if you pull the free ends too hard when tying the bow. The right feel is snug across the top of the ankle, not painful, and not enough to pinch the front of the shin. If your foot goes numb, or if the top of your foot is sore at the end of a run, loosen the middle laces slightly and re-tie the heel-lock with less tension. The technique is meant to hold the heel down without over-tightening the whole shoe.
Will heel-lock lacing stop blisters?
The specific blisters it stops are the ones at the back of the heel and the top of the heel bone, which are almost always caused by the heel slipping up and down inside the shoe with each step. By eliminating the slip, heel-lock lacing eliminates the friction that causes those blisters. It does not stop toe blisters, arch blisters, or blisters caused by soaked socks; those need different fixes. For back-of-heel blisters in an otherwise well-fitting shoe, heel-lock lacing is the first and often only fix needed.
Can I use heel-lock lacing on hiking boots and work boots?
Yes — hiking boots and work boots often benefit most, because they are heavier, have taller collars, and are worn on uneven ground where a slipping heel is a real problem. Most hiking boots have the required top eyelet built in; some have a dedicated hook rather than a hole, which the lace loops around the same way. On steep descents, heel-lock lacing is the difference between arriving with intact toenails and arriving with black ones. Trail runners doing long descents should heel-lock by default.
Does heel-lock lacing help with Achilles pain?
It helps with one specific slice of Achilles complaints — irritation from the shoe collar rubbing the Achilles insertion with each step. By holding the collar snugly against the front of the ankle, the heel-lock reduces the collar's back-of-heel movement and cuts the friction. It is not a treatment for Achilles tendinopathy itself; the specific-load rehab (mileage cut, small heel lift, eventual eccentric calf loading) is covered on our pain in the back of the heel walk-through. But for readers whose Achilles pain is friction-driven rather than load-driven, heel-lock lacing is a fast improvement.
Which shoes have the heel-lock eyelet?
Nearly every modern running shoe, walking shoe, tennis shoe, hiking boot and work boot has an extra eyelet set slightly higher and farther back than the main lacing rows. Look for the seventh or eighth eyelet on each side, offset toward the ankle. Some cross-training shoes and casual shoes skip it, in which case a modified heel-lock through the existing top eyelet is possible but slightly weaker. Minimalist runners with soft heel counters are the one category where the technique gives limited benefit, because the counter is not firm enough to hold the heel even under a tight collar.
HeelCups is reader-supported. When you buy through links on our site we may earn an affiliate commission, at no extra cost to you. This article is general information about foot comfort and is not medical advice — see our medical disclaimer.