TAPING
Plantar Fasciitis Taping: The DIY Arch Support That Fits in a Roll of Athletic Tape
A well-applied tape job unloads the plantar fascia the way a firm insole does, and for the price of a roll of athletic tape. Here is the low-dye method that works, when it earns its keep, and where it falls short.
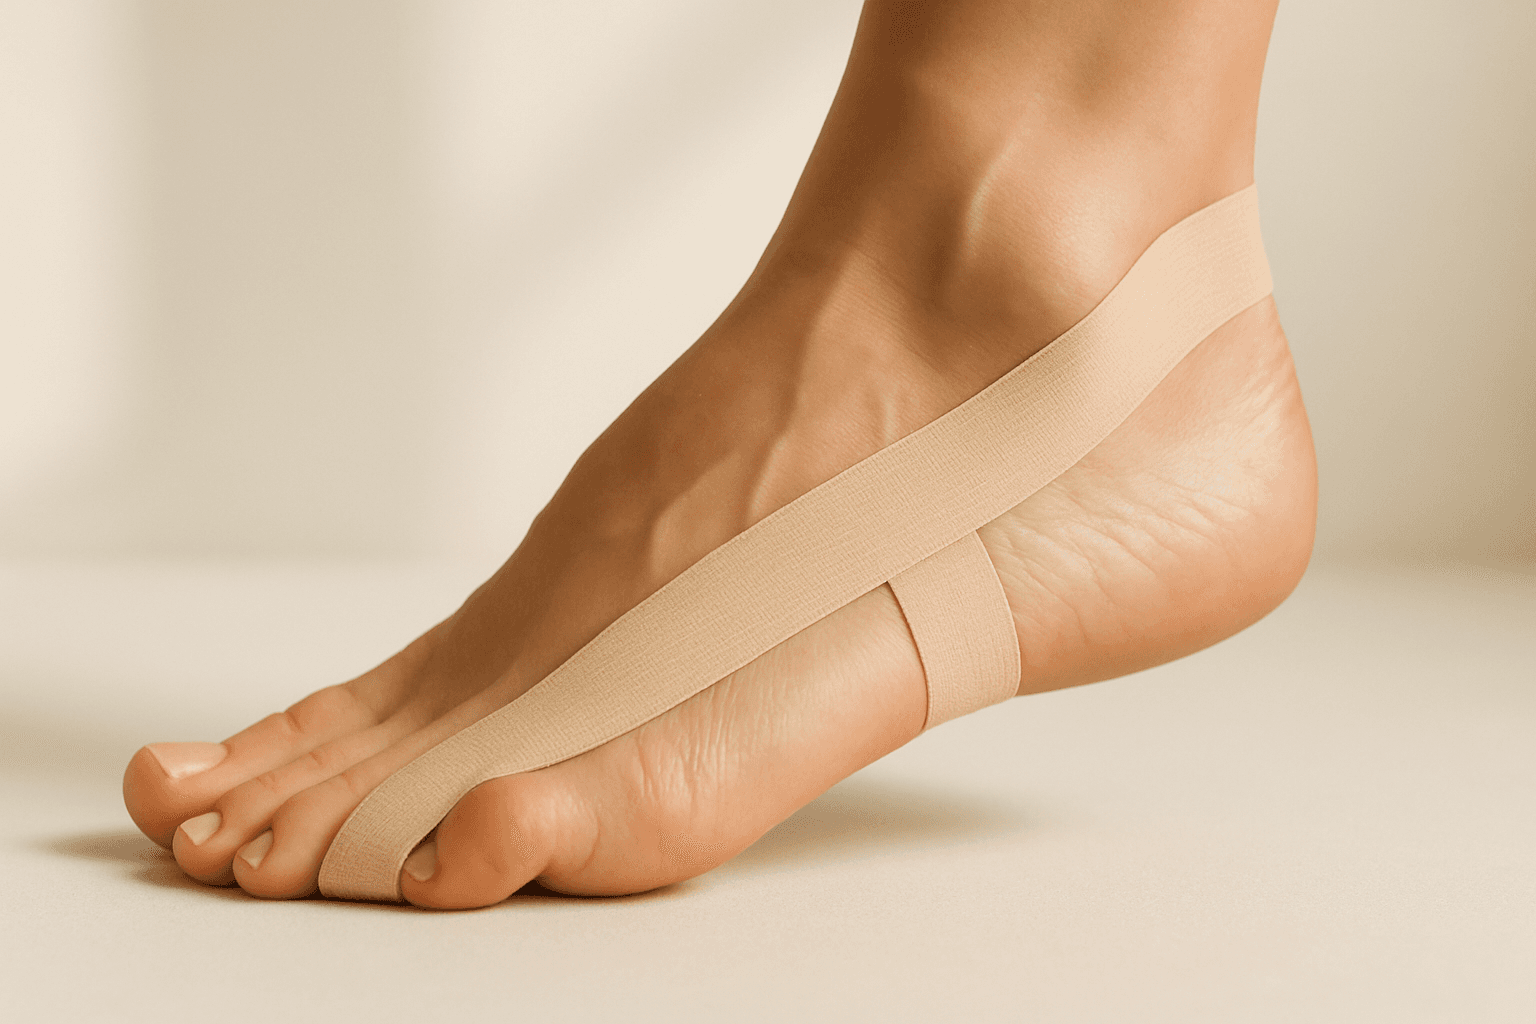
Taping is the oldest low-cost trick in the plantar fasciitis playbook, and it is popular for a reason: a strip of athletic tape applied correctly across the arch can meaningfully reduce the stretch on the fascia during a walking day, and it costs a few dollars a week. Physical therapists teach it for the same reason we recommend a supportive insole — it changes how the fascia is loaded through the day, which is the piece that actually calms an angry fascia down. The tape is not treating the fascia; it is unloading it while you go about your life.
The most-cited home method is the low-dye tape (sometimes spelled 'low-Dye'), first described by an American podiatrist named Ralph Dye in the 1930s and still used in physiotherapy clinics today. A well-applied low-dye tape job creates a supportive strap under the arch and around the heel that mimics what a firm-arched insole does, and for the small number of people who cannot fit a bulky insole into a work shoe — dress shoes, dance shoes, a cycling shoe, a soccer cleat — it is a legitimate substitute for the hours the shoe is on. For everyone else, tape is a useful stopgap while an insole is being broken in or a specific spike in symptoms is being worked through.
This page walks the honest picture: what tape does mechanically, what materials and prep make the tape stick for a full day rather than three hours, the step-by-step low-dye method most physical therapists teach, and when tape is the wrong tool for the specific pain you have. Nothing here is medical advice, and tape does not treat plantar fasciitis. It supports the fascia while your body handles the load of a walking day. Persistent heel pain that has not eased after four to six weeks of honest home care deserves an in-person exam by a doctor or podiatrist.
What plantar fasciitis taping actually does
The plantar fascia is a broad band of tissue that runs from the underside of the heel bone to the base of the toes. Every time you step, body weight lands on the heel, the arch flattens slightly, and the fascia stretches along its length like a bowstring being pulled. In a healthy foot that stretch is well within what the fascia is built to absorb; in a plantar-fasciitis foot the fascia has been stretched past its comfortable limit too often, and every additional stretch on an already-irritated tissue is what the morning stab and the end-of-day ache come from.
Tape works by mechanically limiting how far the arch flattens under load. A strip of athletic tape or kinesiology tape that runs from the base of the toes back to the heel, snug across the arch, physically holds the arch in a slightly higher position through the step. The fascia underneath does not stretch as far. Less stretch means less irritation of an already inflamed tissue, and the walking day is less of a repeated micro-load on the sore area.
Research on taping for plantar fasciitis is modest but consistent. Systematic reviews published in the Journal of Foot and Ankle Research and the British Journal of Sports Medicine have found that short-term taping produced meaningful reductions in first-step morning pain and in Foot Function Index scores across several small trials, particularly in the first two to four weeks of a flare. Taping does not appear to change the natural history of plantar fasciitis — it does not shorten the total months to recovery — but it produces real pain relief while it is on, and for many readers that relief is what makes the rest of the plan (stretching, insoles, cut activity) actually stick.
Materials and prep for a tape job that lasts a full day
The materials cost about seven to twelve dollars for a starter kit and last two to four weeks of daily use. You need one roll of 1.5-inch rigid athletic tape (a zinc oxide tape such as Leukotape P or Zonas, or a generic equivalent) for the anchor and support strips, one roll of underwrap or a pre-tape adhesive spray (Cover-Roll, Fixomull, or a spray-on adhesive base like Cramer Tuf-Skin) to protect the skin, and a small pair of tape scissors. Kinesiology tape — the colorful stretchy stuff — is a different product with a different job; it can complement rigid tape, but for the mechanical support of a low-dye method the stiffer athletic tape is what you want.
Prep matters more than the specific brand. Wash and thoroughly dry the foot, and shave any dense hair on the arch and along the sides of the foot; rigid tape does not stick well to skin oils, lotion or hair. If you are using an adhesive spray, apply a thin even coat and let it tack for thirty seconds. If you are using underwrap, cut a strip long enough to cover the arch and the sides of the heel. Sensitive skin — a common story with older adults, and with anyone who has reacted to athletic tape before — usually wants underwrap between the tape and the skin; younger athletes often skip it and apply the rigid tape directly.
One warning worth naming up front: if you have diabetes with any reduced sensation in the feet, peripheral vascular disease, a history of skin reactions to athletic tape, or lymphedema in the leg, do not tape at home without a clinician's guidance. Rigid tape on skin that cannot feel pressure changes, or on a leg with compromised circulation, can cause pressure injuries that would otherwise be caught by the sensation the tape is uncomfortable. That is a same-week conversation with your primary care physician before the first tape job.
The low-dye tape method, step by step
Sit with the foot flat on the floor and the ankle at ninety degrees. Cut two anchor strips of rigid tape long enough to wrap once around the ball of the foot behind the toes and once around the midfoot at the tallest point of the arch. Then cut one long strip — the stirrup strap — long enough to run from the base of the little toe, around the back of the heel, and up to the base of the big toe. Have two or three shorter cross-strap pieces ready to go under the arch.
Apply the two anchor strips first: the first around the ball of the foot just behind the toes, the second around the midfoot at the tallest point of the arch. Do not pull the anchors tight; they are placeholders, not compression. A rigid tape strip wrapped tight around the ball of the foot creates a tourniquet that reduces circulation to the toes and shows up as numbness or cold toes within an hour.
Apply the stirrup strap from the outside of the ball of the foot, along the outer edge of the foot, around the back of the heel bone, and up the inside of the foot to the base of the big toe. As you cross the underside of the arch, pull the tape upward toward the ceiling — this is the piece that does the mechanical work of lifting the arch. Firm tension across the arch, no tension at the ends where you attach it to the anchors.
Add two or three cross-strap pieces across the underside of the arch, running from the outside anchor to the inside anchor. Each strap goes under the arch at a slightly different angle, and each is pulled snug across the underside of the arch as you attach it. The result is a fan of tape under the arch that supports the fascia through a stepping motion.
Cover the whole taping with a fresh outer wrap of underwrap or a second layer of rigid tape running around the arch, so the ends of the strips are secured and cannot lift during the day. Walk gently around the room for a minute and check for pinch points; if a specific strap is bunching or pulling too hard on one spot, re-do that piece with slightly less tension.
A well-applied low-dye job stays on for a full day of walking, standing and even light jogging. It can be worn in a sock and a shoe, and most people take it off in the evening rather than sleeping in it — the fascia does not need the arch support at rest, and the tape is more comfortable off overnight. Never leave rigid tape on for more than twenty-four hours; the skin needs the break.
When taping is the right tool and when it is not
Taping earns its keep in three specific situations. First, in the acute flare of plantar fasciitis — the first two to four weeks when the morning stab is at its worst — a daily tape job takes real edge off the walking day and lets a stretching-and-insole plan do its work without the fascia being repeatedly re-flared. Second, in shoes that will not fit a supportive insole — dress shoes, dance shoes, cycling shoes, cleats — taping is a legitimate substitute for the hours the shoe is on. Third, as a diagnostic: if a properly applied low-dye tape job reliably reduces your pain across a day, that is strong evidence a firm supportive insole will help too, and it is a low-cost test before committing to a pair.
Taping is not the right first tool in a few common situations. In heel fat pad syndrome — a diffuse bruised ache under the whole heel pad, worst at end of day rather than first thing in the morning — tape does nothing useful because the fascia is not the problem; the fat pad is, and cushioning is what it wants. In back-of-heel Achilles pain, tape at the arch is not addressing the tendon; a small heel lift and calf work are the useful tools. In persistent heel pain in kids, Sever's disease is far more likely than adult-style plantar fasciitis, and tape is not the answer either.
Chronic plantar fasciitis that has been present for more than six months is worth pairing with tape rather than relying on tape alone. Tape gives you the daily support, and a supportive insole in every shoe you own gives you the same support for far more hours per week without a daily application ritual. Our Akusoli insoles review covers the pair we would buy first for that longer-term use; taping is what carries you through the shoes you cannot fit an insole into.
Common mistakes that make tape unhelpful
Too much tension at the ends. The stirrup strap and the cross-straps do their work under the arch; the anchors at the ball of the foot and the ends of the strips do not need any tension at all. Wrapping a rigid tape strip too tight around the ball of the foot creates a tourniquet that reduces circulation to the toes and shows up as numbness or cold toes within an hour.
Not enough tension across the arch. The opposite mistake. Rigid tape applied loosely across the underside of the arch does no mechanical work — the fascia flattens as before, and the tape is cosmetic. Firm upward pull on the stirrup and cross-straps as they cross the underside of the arch is what supports the fascia.
Skipping prep. Applying tape to sweaty, oily or hairy skin means the tape lifts within a few hours, and lifted tape does no work. Ten seconds with a paper towel and, if needed, a thirty-second wait for adhesive spray to tack, means the tape stays on for a full day.
Leaving tape on too long. Rigid tape is a twenty-four-hour tool at the outside. Skin under the tape needs the overnight break. A tape rash under the arch — red, itchy, sometimes blistered — is the tape asking to come off; move to underwrap between the tape and the skin, or switch to kinesiology tape (which is thinner, stretchier and gentler on skin but does less mechanical work).
Ignoring pain from the tape itself. Tape that cuts into the skin, that gives you a specific pinch spot after an hour of walking, or that is worse than the plantar fasciitis it was applied for is misapplied. Come off, re-do, and reduce tension on the offending piece.
Taping alongside the rest of the plan
Tape is a comfort tool that stacks well with the plantar fasciitis stretches that most physical therapists teach on day one — the calf and arch stretches that lengthen the tissue that pulls hardest on the fascia. Tape gives you a comfortable walking day; the stretches do the work of getting the tissue back to a healthy length. Doing one without the other is a slower path to relief.
Insoles do most of what tape does, for more hours per week and without the daily application ritual. A firm-arched insole with a deep heel cup in every closed shoe you own is the highest-leverage upgrade you can make to the shoes you already have, and it does the same mechanical unloading of the fascia that tape does. Our Akusoli insoles review covers the pair we would buy first. Tape is what you fall back on when a specific shoe cannot fit an insole, or when a spike in symptoms wants extra support for a specific week.
Nothing on this page is a treatment for plantar fasciitis. Every recommendation is written for comfort, support and relief while your body handles the load of a walking day. Persistent heel pain that has not eased after four to six weeks of honest home care, or pain that comes with numbness, swelling, warmth or a specific injury event, deserves an in-person exam by a doctor or podiatrist.
The insole that unloads the fascia for far more hours than a tape job
A firm-arched insole with a deep heel cup in every closed shoe does the same mechanical work as a low-dye tape, for hours a day, without a daily application ritual.
The insole that unloads the fascia for far more hours than a tape job →Frequently asked questions
Is kinesiology tape as good as rigid athletic tape for plantar fasciitis?
For the mechanical unloading of the fascia, no. Rigid zinc-oxide athletic tape does not stretch, which is exactly what makes it useful for holding the arch in a slightly higher position through the step. Kinesiology tape is thinner, stretchier and gentler on skin, and it can help with mild everyday discomfort and with skin sensitivities that rule out rigid tape. If you are choosing between the two for an acute flare of plantar fasciitis, rigid tape does the work; kinesio is the fallback.
How long does one tape job last?
A well-applied low-dye tape job with good skin prep stays on for a full day of walking, standing and even a light jog. Most people take it off in the evening rather than sleeping in it — the fascia does not need arch support at rest, and the skin needs an overnight break. Never leave rigid athletic tape on for more than twenty-four hours; the skin under it needs air, and a tape rash is uncomfortable enough on its own to stop you taping for a week.
Can I run or exercise with the tape on?
Yes. A low-dye tape job is designed for the loading of a walking or jogging day, and many runners with an early flare tape for their easy runs while they scale back mileage and let the fascia settle. Long runs, hills and speed work are worth cutting during the acute phase whether or not you are taped; tape is a support tool, not permission to load the fascia hard. Cycling, swimming and yoga are all fine with a fresh tape job.
Will my insurance cover a physical therapist doing the taping?
In many U.S. plans, yes — a course of physical therapy with a prescription from your primary care physician or a self-referral where the state allows it is often a covered benefit, and a therapist will tape you and teach you (or a partner) how to do it at home. The tape supplies themselves are usually out of pocket at seven to twelve dollars a starter kit. Check with your specific plan; the covered benefit is worth using if it exists, because a good hands-on demonstration is worth several read-throughs of any web page.
What do I do if the tape irritates my skin?
Come off immediately, wash the area with mild soap and water, and let the skin air-dry for at least twenty-four hours before re-taping. On the next attempt, put a layer of underwrap or a hypoallergenic adhesive base spray between the skin and the rigid tape. If you react again to underwrap-plus-tape, switch to kinesiology tape (which many people tolerate when they cannot tolerate rigid athletic tape) and accept the smaller mechanical effect. Persistent skin reactions to any tape are worth mentioning to a clinician before the next attempt.
Should I tape both feet if only one hurts?
Only the sore one, unless the other foot is starting to complain too. Taping an asymptomatic foot changes its mechanics for no good reason and can create a compensatory ache elsewhere. Watch the other side across the first week or two — plantar fasciitis on one side often shows up on the other within a few months if the underlying habits (shoe environment, standing hours, calf tightness) have not changed. If the second foot starts to grumble, tape it too and re-read the plan.
HeelCups is reader-supported. When you buy through links on our site we may earn an affiliate commission, at no extra cost to you. This article is general information about foot comfort and is not medical advice — see our medical disclaimer.